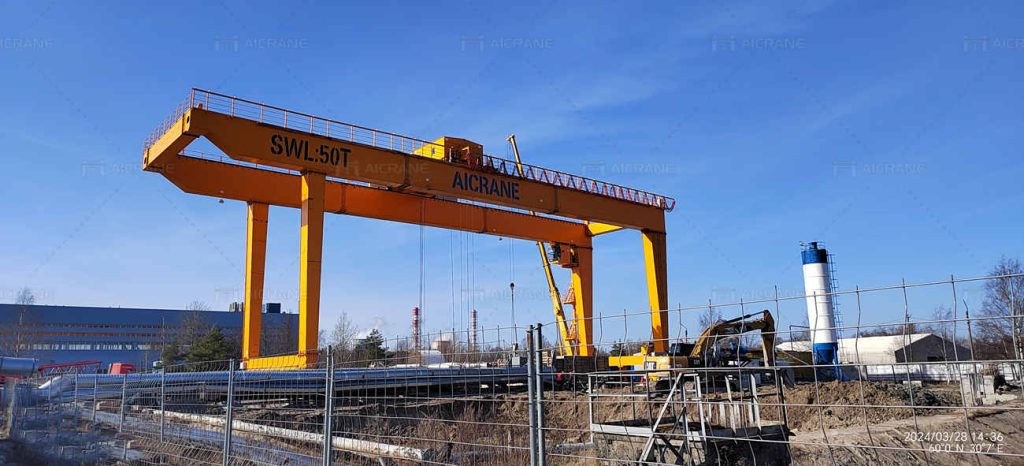
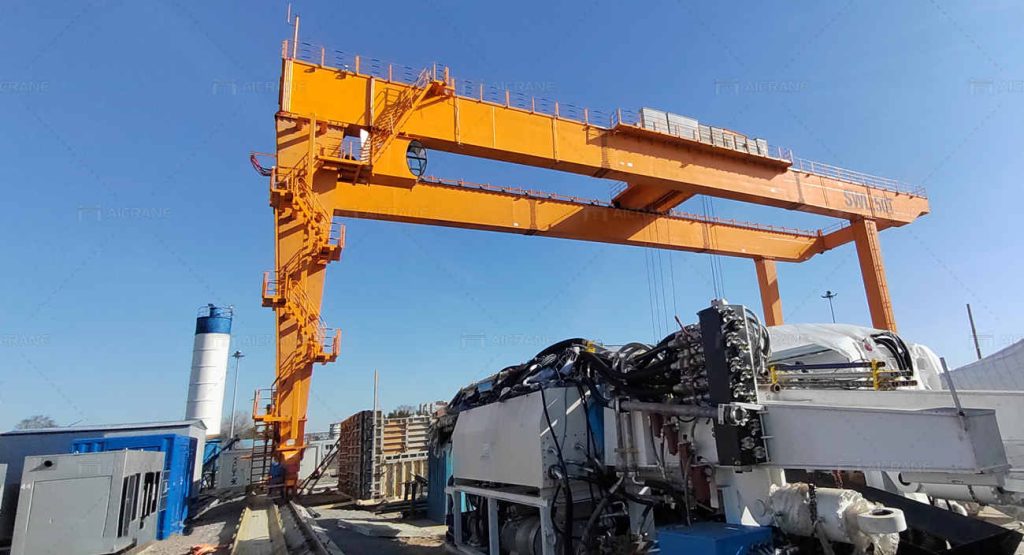
A 50t gantry crane is an essential piece of equipment in various industries for lifting and moving heavy loads across a designated yard area. These cranes are widely used in construction, manufacturing, shipyards, and other industrial settings where heavy materials need to be transported efficiently. Installing a 50t gantry crane in a yard involves several critical steps to ensure proper setup, safety, and optimal operation. This guide will outline the process for installing such a crane, highlighting key considerations, safety measures, and tips to ensure the installation is successful.
Step 1: Planning and Site Preparation
Before the actual installation of the 50t gantry crane, careful planning and site preparation are crucial. The first step is to evaluate the yard where the crane will be installed. This involves assessing the ground conditions, ensuring sufficient space for crane operation, and determining where the crane’s rail tracks or foundation will be placed.
Ground Conditions: The ground must be stable and strong enough to support the crane’s weight and the loads it will lift. Soft or uneven ground can result in instability, making the crane unsafe to operate. The soil may need to be compacted, or additional foundation work may be required.
Crane Layout: Design a layout that allows the 50t gantry crane to move freely across the yard without obstruction. The path of the crane’s movement must be well-defined, with consideration given to both horizontal and vertical clearance.
Environmental Factors: Consider environmental factors such as wind conditions, temperature, and potential weather challenges. Since the crane will be installed outdoors, it needs to be durable enough to withstand these factors without compromising performance.
Step 2: Assembling the Crane Components
Once the site is prepared, the next step is assembling the components of the 50t gantry crane. Depending on the model, the crane will likely come with the following major components:
1. Girders (Single or Double): For a 50-ton crane, double girders are common as they provide additional strength and stability.
2. Legs: The crane’s supporting legs, which attach to the girders and provide the vertical support needed to lift heavy loads.
3. Hoist and Trolley System: These are the mechanisms responsible for the vertical lifting and horizontal movement of loads along the girders.
4. Electric Systems: Control panels, power supply systems, and wiring that operate the crane.
5. Rail Tracks (if applicable): If the 50t gantry crane is rail-mounted, then installing the rail tracks is essential for crane movement.
It’s critical to follow the manufacturer’s guidelines and technical drawings when assembling the crane components. Some of these steps include:
Pre-assembly on Ground: Certain parts of the crane, such as the girders and legs, may be assembled on the ground before lifting them into position. This reduces the risk of accidents and ensures precision.
Rigging and Lifting: Use heavy-duty lifting equipment, such as mobile cranes or hydraulic jacks, to lift the pre-assembled parts into place. Precision is crucial here to ensure all components are aligned properly.
Bolting and Welding: Secure the components using bolts, and in some cases, welding may be required to connect certain structural parts of the crane. Ensure all fasteners are properly torqued and secured.
Step 3: Installing the Rail Track System
For a 50t gantry crane, especially those designed for yard operations, the rail track installation is a critical part of the process. The crane typically moves along rail tracks, which must be perfectly aligned and securely installed to ensure safe and smooth crane movement.
Rail Track Alignment: The rail tracks must be laid out in a straight line, parallel to each other, and spaced according to the design specifications of the 50t heavy duty gantry crane. Any misalignment in the tracks can lead to derailment or inefficient crane operation.
Securing the Rails: The rails must be securely fixed to the ground or a concrete foundation using rail clamps or other securing methods. This ensures that the tracks stay in place under the weight of the crane and the loads it carries.
Checking for Level: Use laser levels or similar tools to ensure that the rail tracks are perfectly level. Uneven tracks can cause operational issues, including premature wear on the crane’s wheels and rails.
Step 4: Hoist and Trolley Installation
After the structure of the 50t gantry crane is assembled and the rail tracks are in place, the next step is installing the hoist and trolley system. This system is responsible for lifting and transporting loads across the yard.
Hoist Installation: The hoist is the main lifting component of the crane, and it is typically mounted on the trolley, which moves along the girders. Make sure to install the hoist according to the manufacturer’s specifications (https://aicranemachine.com/), paying close attention to weight limits and safety guidelines.
Trolley Installation: The trolley must be installed so that it can move smoothly along the crane’s girders. Check the alignment and ensure that the wheels are properly greased and free of obstructions.
Electrical Wiring: Install the wiring for the hoist and trolley system, ensuring it is protected from the elements and securely connected to the crane’s control system.
Step 5: Electrical System Setup and Testing
The 50t gantry crane will require a reliable electrical system to operate the hoist, trolley, and crane movement. This step involves setting up the crane’s control panel, power supply, and safety mechanisms.
Power Supply: Connect the crane to its power source, typically through an overhead cable system or festoon system that moves with the crane as it operates. Ensure that all electrical connections are properly insulated and protected from the environment.
Control System: The control system allows the operator to move the crane, hoist, and trolley. Set up the operator’s control cabin or remote control, and make sure that all buttons and levers are working correctly.
Safety Features: Install and test the safety features of the crane, including emergency stop systems, overload protection, and anti-collision sensors. These features are critical to preventing accidents during crane operation.
Step 6: Testing and Commissioning
Once the 50t gantry crane is fully installed, the final step is testing and commissioning. This ensures that the crane is safe, efficient, and ready for operation.
Load Testing: Conduct a load test by lifting a load close to the crane’s maximum capacity (50 tons). This tests the structural integrity of the crane, its hoist, and the trolley system. Ensure that the crane can lift and move the load smoothly without any issues.
Operational Testing: Test all movements of the crane, including horizontal and vertical lifting, trolley movement, and crane travel along the rails. Check for smoothness, noise, and any vibrations.
Safety Checks: Finally, check all safety features, including limit switches, emergency stop systems, and overload protection. Ensure they are functioning correctly before putting the crane into full operation.
Installing a 50t gantry crane in a yard requires careful planning, precise assembly, and thorough testing to ensure safe and efficient operation. By following the steps outlined above, including site preparation, rail track installation, component assembly, and final testing, you can ensure that your 50t gantry crane will be a valuable asset to your yard, providing reliable service for many years. Regular maintenance and inspections will further ensure the crane’s longevity and safety in daily operations.